SEO services NYC

All parents know: a children’s room should not only be cozy and comfortable, but also safe and functional. In this article, we talk about the design features of a children’s room and share tips for decorating and selecting furniture.

General rules for creating an interior in a kid’s room.
* First of all, take into account the rapid changes in kid’s preferences and leave room for further maneuvers in the future – the interior of the baby’s room will be different from the student’s room.
* Do not place small rugs on the floor – they are easy to slip and fall on
* Try to reduce the number of sharp corners;
* Do not clutter up the space;
* Avoid decorating walls with massive paintings, mirrors and other interior items.

Lighting
Think carefully about lighting, both natural and artificial – it should be enough for the entire room.
Choose curtains that are not too dense – the fabric should transmit sunlight well. For evening lighting, a ceiling lamp with soft light, a night light and a table lamp for evening reading are optimal.

Space and Furniture
Do not overload the room: everything should be simple and clear. It is better for an active kid to leave more space for movement, and the student will eventually need new things, which will also need to be stored somewhere. Pay attention to the fold-out couches for children – they not only save valuable centimeters in the room, but are also equipped with comfortable sleeping places.

Furniture for a kid’s room should be not only bright and beautiful, but also comfortable and safe: large free-standing wardrobes, dressers and other items with legs should be stable, and chairs should be soft and ergonomic. It is advisable to choose a bed or a fold-out couch with an orthopedic base.

Boy or girl – differences in the interior
It is not at all necessary to paint the walls blue, put a sofa with cars in a boy’s room and decorate everything with ruffles, or to choose wallpaper with princesses in a girl’s room – modern interiors have long since moved away from these stereotypes.

And although the design of a boy’s room assumes neutral cold tones, the palette is not limited to blue and blue shades. A moderate combination of “cold” and “warm” will make the room much more comfortable.
In the design of a children’s room for a girl, not only pink and white colors can be used, but also turquoise, purple, brown, blue and others.


One room for two
It is better to start the design of a kid’s room for two children of different sexes with zoning: divide the space for relaxation from the space for classes. A loft bed would be a good option – two of these beds can be placed on different sides of the room with a desk below the upper tier for each child.

In a narrow room for two children, you can place two beds along one wall, dividing them with a nightstand or other piece of furniture, and on the other side put the large common desk.

A room for two boys or two girls is decorated in the same style.

The child should feel comfortable in his/ her room. Therefore, it’s design depends not only on your vision, but also on his personal preferences.
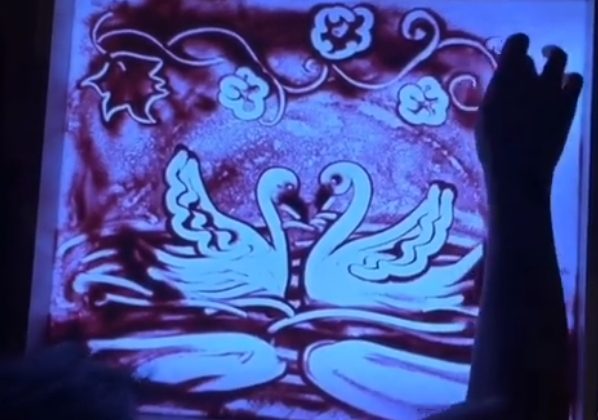
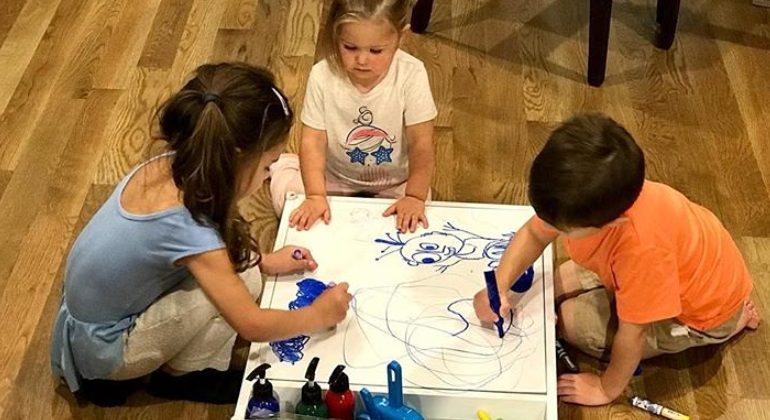
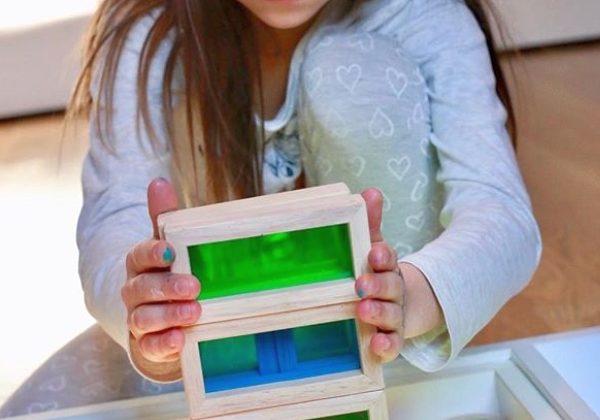
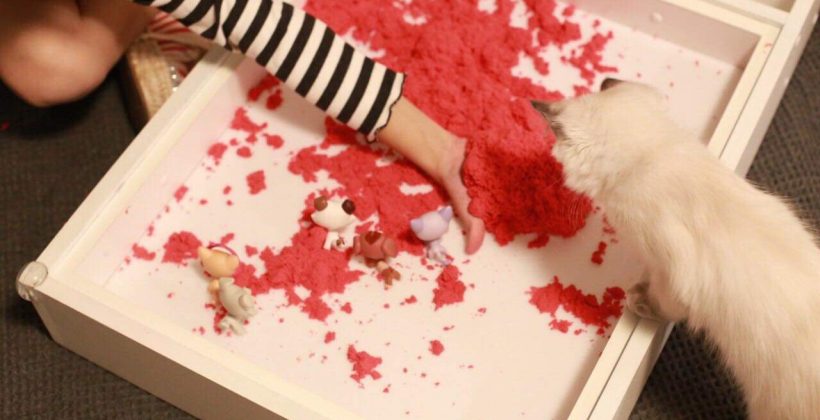
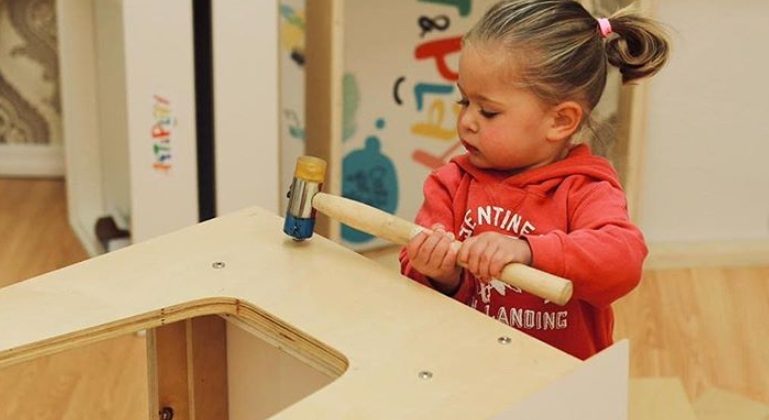
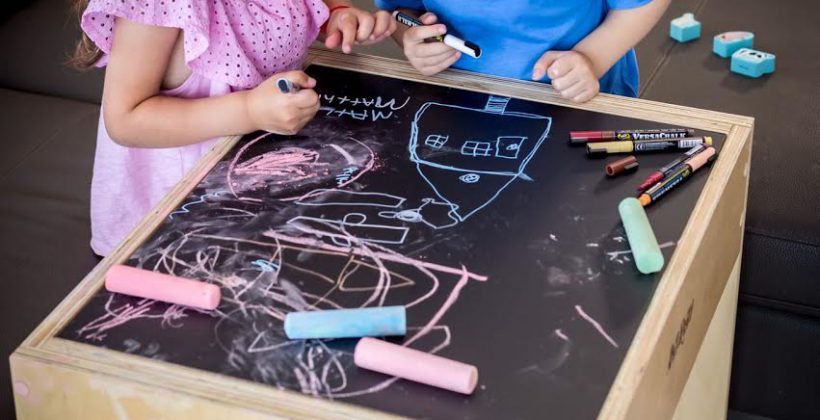
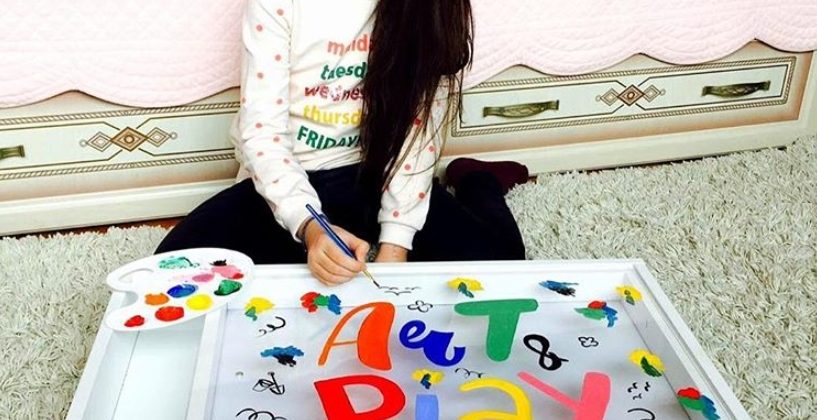
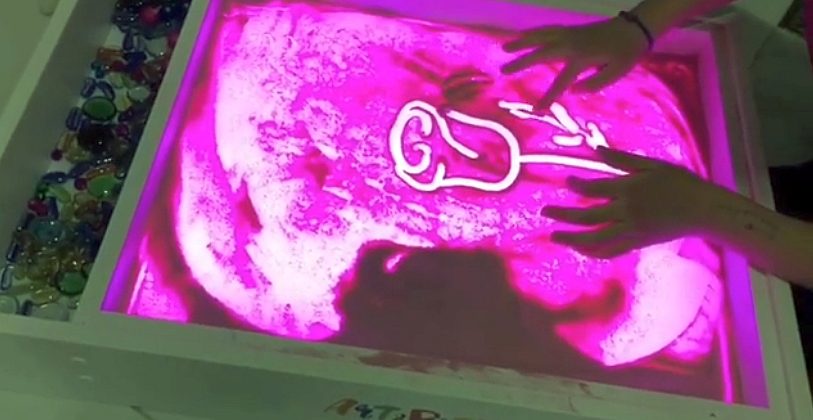
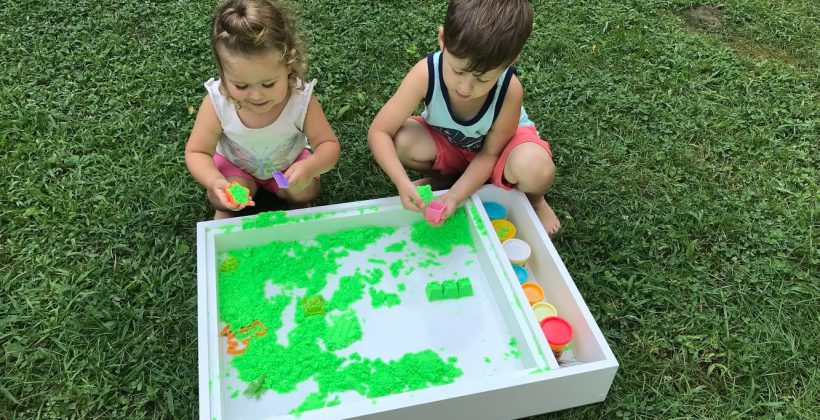
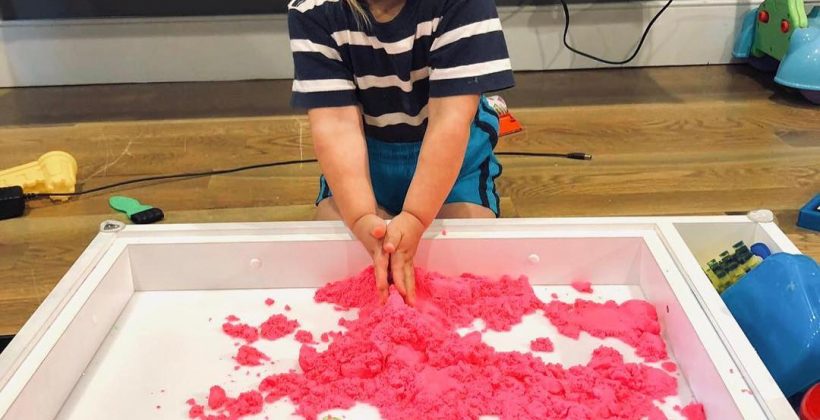
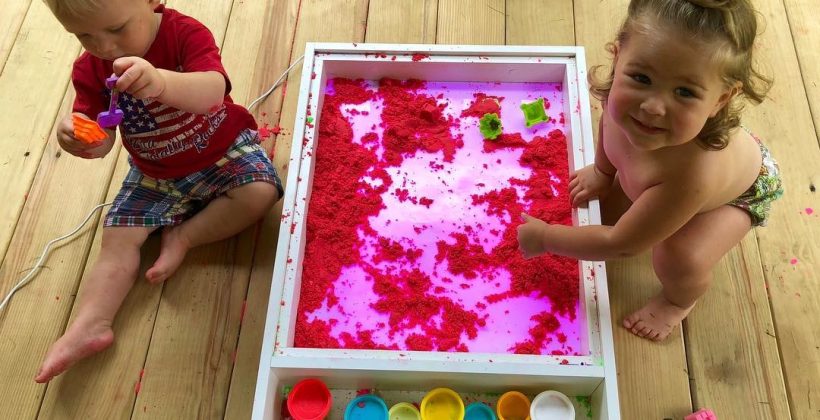
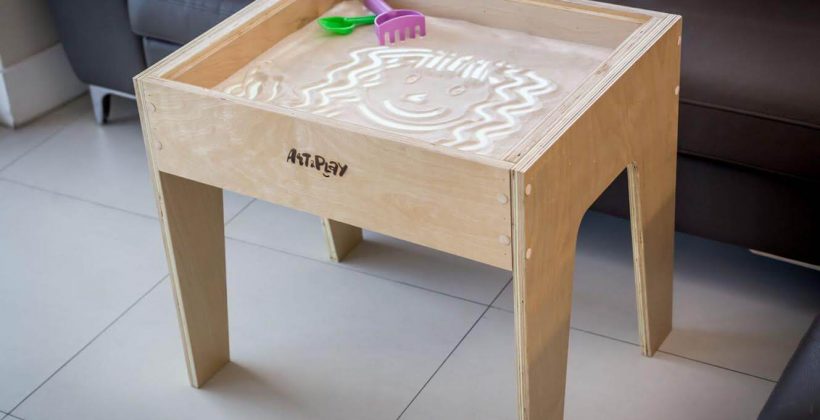
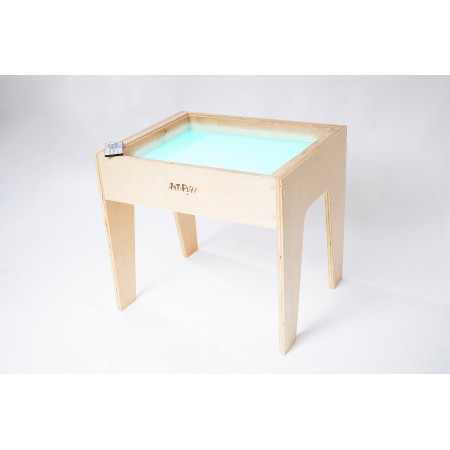
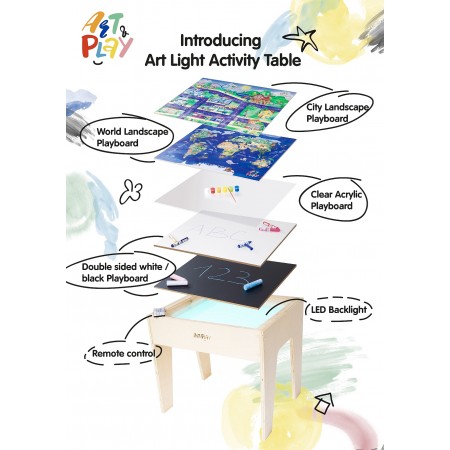
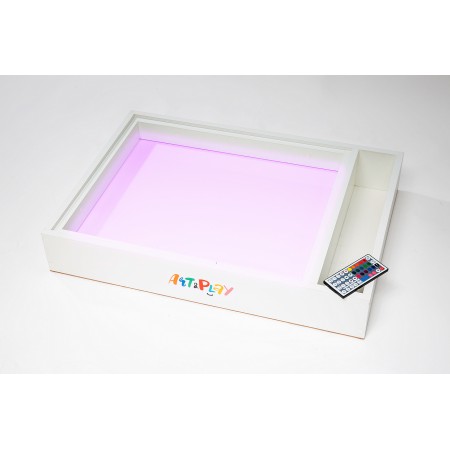
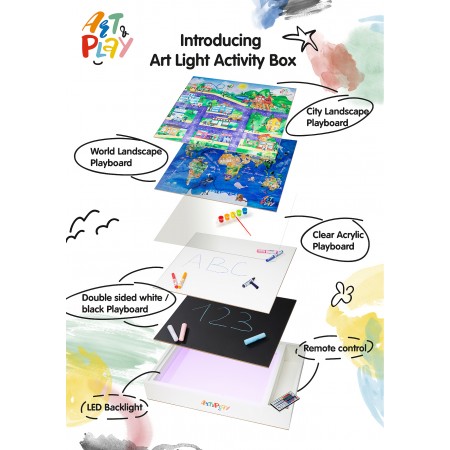
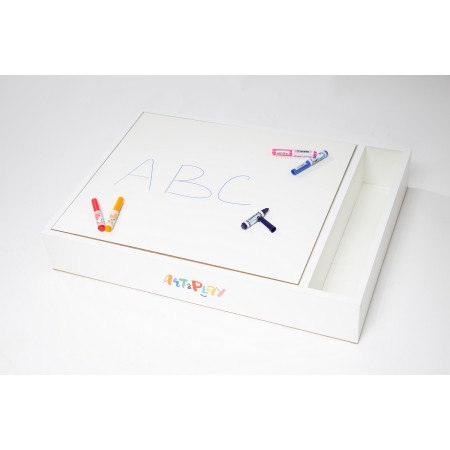
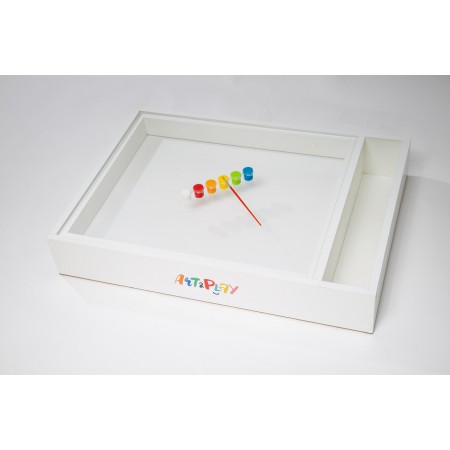
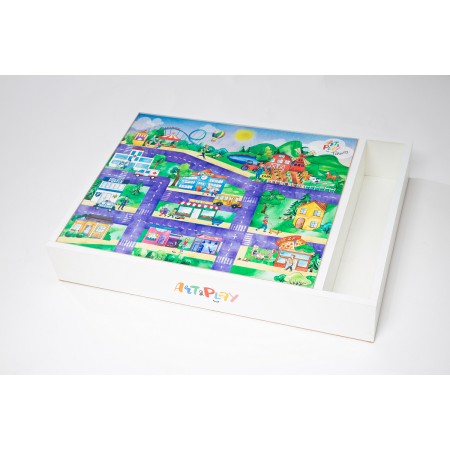
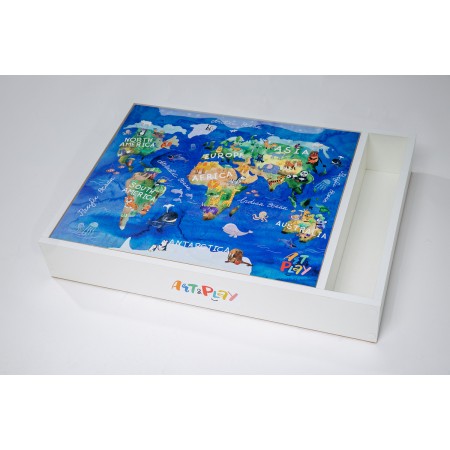
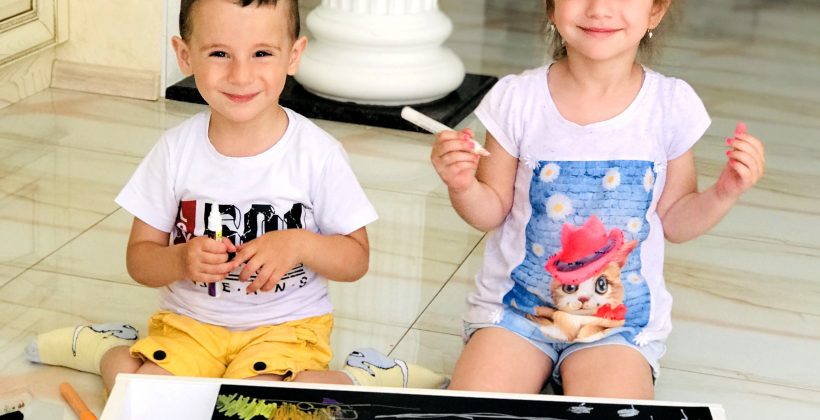
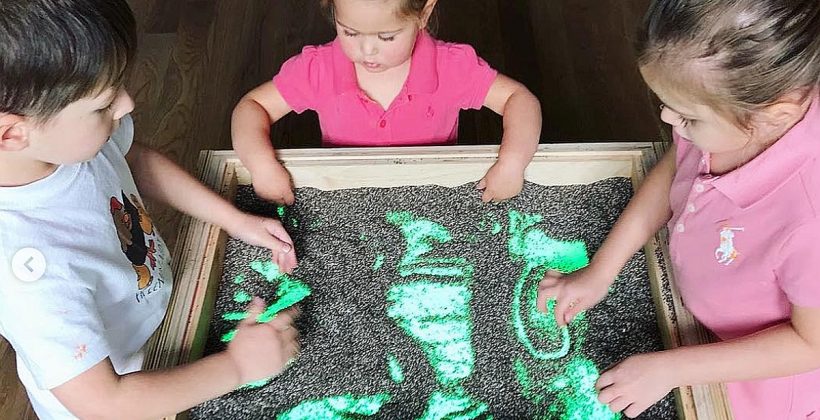
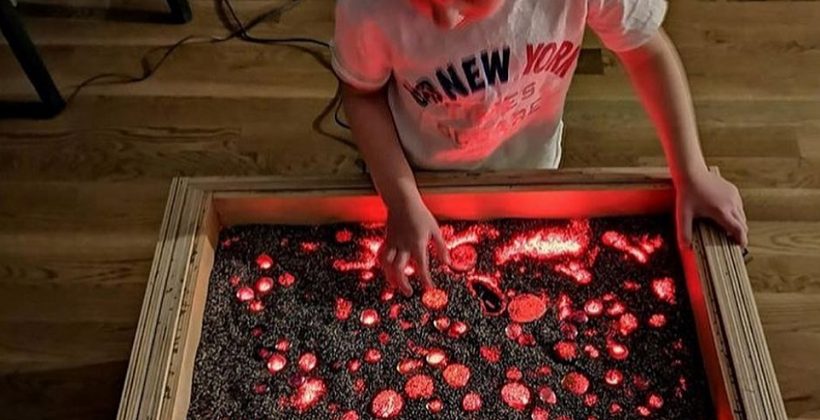
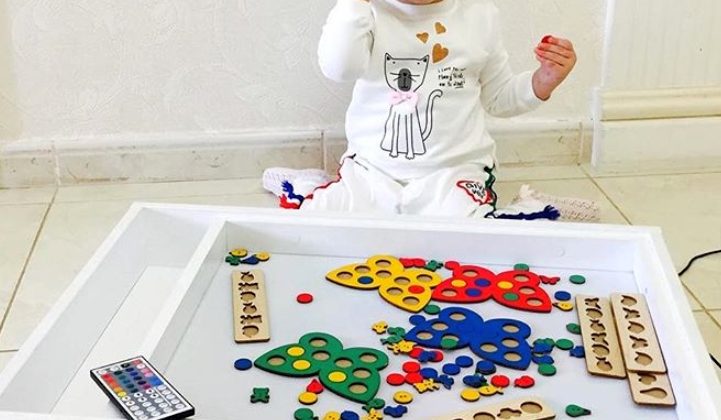
Our Art Light Activity Table/ Box will fit into any interior and will become an irreplaceable tool in the development of a child.

off comments

Finger Games

Finger games are the staging of poems and rhymes, rhyming stories, fairy tales with the help of fingers.  Finger games help to develop fine motor skills, which stimulate the development of speech centers. A kid receives new tactile impressions, learns to focus and concentrate. Such games are designed for children from six months; interesting for kids up to five years. Kids do exercises for one hand, three-four-year-old children use all fingers, and after four years, different small objects are used.

You should choose different games according to the kid’s age.

First, demonstrate in details all the actions, and then ask to repeat or do it together with you, using the fingers of the baby.

If kids cannot cope with the game by themselves it should be simplified.

Parents can write funny simple poems themselves and accompany them with all the movements of the child’s fingers.

Each finger must be involved in to the game moving together and individually.

Symmetric and asymmetric hand movements should be alternated. With the most difficult games, where the right and left hands simultaneously produce different actions, the child should be introduced to approximately five years.  For some games, you can use different caps, or draw funny faces on the fingertips.

Finger games can be practiced both in the development group and at home – this does not require material costs or special conditions. Before the start of the game, it is better to “warm up” the fingers of the child with a light massage or exercise. To begin with, the mother herself should learn the text and movements, tell the kid about the new game. It is necessary to pronounce the text without haste, with pauses, expressively, lowering and raising the voice, with an emphasis on keywords. Of great importance is the corresponding facial expression of an adult. With repeated repetition of already known words, the baby will begin to sing together with the mother.

off comments

Almost all children love playing with playdoh or modeling clay and use all suitable materials for it – from sand at the playground to cookies dough. This activity is not only exciting but also beneficially. The benefits for the parents are obvious: the child is busy for a long time. The benefits for children are much more significant.

For mental development

  • When kids crumple playdoh (or other material) in their hands, they create different shapes, attach them to each other, flattens, stretches, developing fine motor skills in this way. It has been scientifically proven that it directly affects the development of a child’s speech, coordination of movements, memory, and logical thinking.
  • When a child concentrates on this activity, they learn to be patience and perseverance.
  • When they create new forms or mix colors, figurative, abstract and logical thinking develops, revealing creative abilities.
  • When kids roll a ball or a sausage with two hands, both hemispheres of the brain activate, inter-hemispheric connections are strengthened, which, in turn, promotes attention and self-regulation.
  • This activity develops memory, the ability to compare facts and images, logical thinking, patience, the ability to gather, concentrate, complete the task and evaluate the result, comparing it with the original one.
  • When a child plays with modeling clay or playdoh, imagination, creativity and creative thinking are developing.


Playing with modeling clay and playdoh is important for health and emotional state

  • These exercises have a beneficial effect on the nervous system, mental and emotional state of the kid.
  • Regular exercises help to normalize sleep and reduce excessive activity and irritability.
  • If necessary, playing helps children non-verbally express existing internal conflicts and contradictions.
  • Activities with modeling clay or playdoh allow you to overcome fears through physical interaction – break, crush figures or change it to make something good.
  • It is associated with a wide range of feelings: from tactile sensations, color perception and smell to complex internal states – excitement, interest, joy.
  • Play with modeling clay or playdoh helps a child to express emotions (including negative ones) in a socially acceptable manner, to cope with pain, anger, anxiety.
  • The crafts that the child creates will help adults understand and assess the presence of emotional or personal problems.
  • Creating, a child is able to relax, relieve tension, calm down and get rid of a bad mood.
  • For little dreamers, creating becomes a kind of bridge from the world of own fantasies to real life. It helps to accept the existing world and come to terms with its imperfections.
  • Psychologists are actively using modeling clay as one of the areas of art therapy, which refers to the inner hidden self-healing resources of the child.
  • The experience of creating masterpieces from everyday materials convinces a child of importance and necessity, teaches them to look at things from a different angle and find original solutions in different situations.

Activities with modeling clay and playdoh helpful for kids personal development


  • This activity is a simple and effective way to identify hidden abilities and develop the natural skills of kids, to demonstrate their uniqueness and creativity.
  • Playing with modeling clay or playdoh introduces children to the concepts of shape and color. Gives the experience of tactile perception at the difference between “soft-hard”, “warm-cold”, “wet-dry”.
  • Work with materials, which shape can be changed to a new one, develops the child’s self-confidence, responsibility, and curiosity.
  • The child learns new things and tries to consciously use his skills to achieve the desired result.
  • In addition to basic motor skills, modeling develops a sense of purpose, perseverance, and accuracy.
  • Working on 3D images, children study characteristic features of objects, clarify details, interpret the basic qualities of objects. They form knowledge about the properties and laws of the surrounding world, they train the visual perception.
  • Modelling plays a significant role in the aesthetic education of the child and the development of their sense of beauty.


off comments

During painting, a kid works out the accuracy of the hand`s movement, develops fine motor skills, coordinates its actions with vision.

When children painting, they are free from restrictions, so this type of activity is closest to them. They focus all the attention on the process, and at this time they develop independence, organization, the ability to plan everything, the desire to do this job as best they can.

It is impossible to teach creative insight, but it is possible to facilitate its occurrence without the help of an adult. Mom should show how one thing takes many shapes, how to mix colors.

Mixing colors, children feel that they are the creators of their favorite color. Even mixing only two colors, you can not get the same color twice. The world of a child is colored with dozens of colors, vocabulary gets enriched.

It is very important to encourage everything new, unusual, interesting in painting, to accept the fantasy and invention of a child.

Children pictures should be posted on the wall.  Young artists can be proud that their work brings joy not only to them but also to other people.

You can paint with the most unusual material: Crayons, school and wax crayons, gouache, watercolors, oil paints, pastels, bricks, cobblestones, paints on glass, charcoal, felt-tip pen, pen, berries, pencil crumbs. Well and, accordingly, on a great variety of materials: Paper of various shapes (triangular, round, square), album sheet, large and small sheets of wallpaper, plywood, cardboard, asphalt, velvet paper, egg, stone, fabric.

In addition, you can also draw with different parts of the body: draw with your fingers, make handprints and feet, taking a pencil or brush with your feet and teeth.

Help your child to feel the full range of painting opportunities. All these techniques will develop the creativity, sensitivity of the fingers, the emotional sphere of the child. Therefore, we suggest painting!

The painting also helps to develop speech. Even before they start to depict something concrete, they already “tell” about their scribbles and see familiar images in them.

During painting, children often comment on what they depict, and the drawing becomes a living picture. It is necessary to carefully listen to the stories of the kid and ask leading questions, to be interested in the characters, plot, and details.

Drawing for kids: age matters

A kid who already sits confidently can be given paints. Of course, fingertips one. Spread the paper in front of, show how to dip a finger to the paint.

0-2 years. Meaningless doodles and strokes, involuntary lines, inflicted in chaotic disorder.

2-3 years. Shapeless images that are visually similar to the early drawings, but now the little one is trying to find meaning in her work.

3-8 years. Schematic images. At this time, the child makes drawings based on certain canons (heaven and earth in the form of stripes at the edges of the sheet, lack of perspective and real ratios of objects).

off comments

Fine motor skills develop gradually, this is an individual process and for each child it passes at its own pace. At first, the movements of the child are awkward, inept and disharmonious. To help your child improve fine motor skills, you need to play developmental games with the kid. Here some useful exercise to have with  your kid at home.

Activities for the development of fine motor skills


  1. Pea

You will need a pea and a jar with a removable lid. Show the child that you first need to remove the lid, then take a pea with your fingers and put it in a jar, then close the lid. Ask your child to do the same. Do not be discouraged if the first time does not work. Show your child the whole chain of actions slowly several times and then the will be able to repeat everything. Active kids are quickly bored with this game, in this case, you do not need to force them. Offer your child a different game.


  1. Screwing the caps

Such a simple exercise, as screwing and unwinding the lids of cans, bottles, bubbles, develops dexterity of fingers. Offer your kid different size and shape, it will make the game more diverse.


  1. Fastening, unzipping and lacing.

This exercise will not require any additional toys. Gradually involve the child in the dressing process. Let kids fasten the buttons and zippers. This will not only develop hand movements but also teach the child to be independent. Give your child some unnecessary shoe with a lacing, which will be an excellent trainer for hands.


  1. Sculpting

Sculpting is suitable for children of different ages. For modeling are suitable clay,  play-dough, dough. When you are going to bake something, be sure to involve the child with you. Kids really like to knead and roll out the dough. In addition, they will be proud to help the mother.


Exercises for the development of fine motor skills


  1. Drawing and coloring

It is very useful to trace the outline of pictures consisting of  lines or digits, as well as to color objects of various shapes. It is very useful to draw on vertical surfaces: a wall, a board, a mirror. Therefore, it is advisable to hang a special board for the kid for drawing.


  1. Collecting mosaics and puzzles

Different puzzles and puzzles with large pieces are chosen for children under 3 years old. Puzzles also train the imagination.


  1. Cutting

Buy baby scissors, glue stick, colored paper, and cardboard. Cut pictures, stick them, make snowflakes, etc. This will not only develop fine motor skills, but also spatial imagination and creative thinking.


However, it is worth remembering one simple thing. Games for the development of fine motor skills should be supervised by adults. Otherwise, the child may swallow some small part or choke it. To play games and perform exercises that develop fine motor skills, you need to repeat them systematically. Work with your child every day and soon you will notice that the movements of your baby become more and more smooth, precise and coordinated each time.

off comments

There are many activities, games, and exercises for the development of fine motor skills. They can be divided into the following groups: finger games, games with small objects, modeling and drawing, finger massage. Articles about child development in the Montessori system as well as Montessori games will also be interesting.

Consider the most simple and effective games:

  1. Palm massage

This is the easiest and most versatile for any age method of developing fine motor skills. With your finger, slide your hands around the baby, stroke and massage them. Accompany your actions with funny songs.


  1. Clap your hands

Since childhood, everyone knows “Clap your hands” games. These activities will teach the youngest to straighten fingers and clap their hands.


  1. Tearing paper

This exercise is suitable for children from 7 months. Give your baby a few sheets of soft colored paper. The kid with pleasure feels it, will start to twirl in hands and to tear. This exercise will entertain and develop.


  1. Turning pages

After a year, tearing the paper can be replaced by turning the pages of some picture book or magazine.


  1. Beads

Children like to sort out small items, which is very useful. Therefore, you can put on some beads with beads of various sizes and shapes. The child will be happy and interested to touch them with fingers.


  1. Stacking and sorting toys

These toys are useful as they can be stacked, put them into each other. This game forms the concept of the size of the objects to a child.


  1. Cereals

Put any cereal in a bowl and give it to your baby. This game develops fine motor skills and tactile sensations.


  1. Jars of cereals

Put different cereals in jars and let the child take turns to lower each hand into each jar. So he or she will be able to probe different grains and take them with fingers. You can complicate the task. Before the child’s eyes, bury some small object in the cereal and give a jar. Let your child try to find this item.


  1. Drawing on the sand

Put sand on the Art Light Activity Box. Take the child’s finger in your hand and run it on the sand. You can start with simple shapes – lines, rectangle, circle, gradually complicating the task.

off comments

Fine motor skills are the ability to perform small and precise movements with hands and fingers as a result of coordinated actions of the most important systems: nervous, muscular, and bones.  The field of fine motor skills includes a wide variety of movements: from simple gestures (for example, to seizing toys) to very complex movements (for example, to write and draw).

The development of fine motor skills plays an important role in the overall development of the child. Fine motor skills develop already from early childhood. First, a baby examines the hands, then the baby learns to control them. First, kids take objects with the whole palm, then with only two (thumb and thumb) fingers. Then the child is taught to properly hold a spoon, pencil, brush.

Fine motor skills have a very important feature. It is associated with the nervous system, eyesight, attention, memory, and perception of the child. Also, scientists have proven that the development of fine motor skills and the development of speech are closely related. And this is can be simply explained. In a brain speech and motor centers are located very close to each other. Therefore, when stimulating the motor skills of the fingers, the speech center begins to be activated. That is why for the timely development of the child’s speech, great attention should be paid to the development of fine motor skills. Fine motor skills directly affect manual dexterity, handwriting, which will be formed later, on the child’s reaction speed.

According to the peculiarities of the development of fine motor skills, the child is later judged on his readiness for training in a school. If everything is in order, then the child is prepared for learning to write, knows how to think and reason logically, has a good memory, concentration, attention and imagination, coherent speech.

Fine motor skills develop gradually, this is an individual process and it passes at its own pace for each child. At first, the movements of the baby are awkward, inept and disharmonious. To help your child improve fine motor skills, you need to play developmental games.

off comments

Development of fine motor skills of kids 3-4yo

The development of fine motor skills of children of 3-4 years old helps not only to improve the coordination skills of the kid but also contributes to the formation of beautiful and clear speech. One of the teachers and young kid development researchers said that the children mind lives at the tips of their fingers. And this beautiful metaphor has a lot of scientific explanations. Psychological research has shown that the development of finger dexterity has a beneficial effect on almost all thought processes – speech, memory, attentiveness, etc.

So will consider how we can promote and support our kids at this age?

Development games which improve kids’ fine motor skills have been already understandable for them in this age but any new information should be provided in an accessible game form.

For the development of motor skills, teachers recommend paying attention to the following types of activities:

  1. “Circle the subject.” This exercise not only improves the fine motor skills of both hands but also develops the child’s artistic abilities. The task is very simple – ask the child to circle around the contour of any suitable object, for example, your own palm, the bottom of a glass, etc.
  2. Finger theater. The development of fine motor skills in this age should be accompanied by an exciting game because at this age, children are no longer interested in simply sorting or pouring objects. Play with the child in the finger theater, which will permanently draw the attention. Finger toys can be sewn independently or you can buy a ready-made set. Coming up with actions for your character, the kid will train his fingers well, making them more flexible and agile.
  3. Snowflakes and paper figurines. In 3-4 years, the child already knows how to use scissors, so it’s time to teach him or her to cut snowflakes and paper figures. Finished crafts can be painted with colorful paints, what also has a good effect on the development of fine motor skills.
  4. “Little musician.” Playing musical instruments perfectly develops fine motor skills of hands, and also has a positive effect on the mental processes of the kid. If you did not plan to teach your child music at such an early age – buy him or her a toy instrument (piano, guitar, flute), mastering which will improve the child’s motor skills. In addition, fine motor skills can be developed with the help of other creative activities – drawing, sewing, modeling clay, dough or kinetic sand.
off comments

Have you ever sharpened colored pencils? Most likely, you do this regularly. And when the sharpener is filled, what are you’re doing with its contents?

With these “waste” you can create a real masterpiece of art! I want to suggest you a lot of ideas of simple and complicated crafts from colored pencils shavings.

To create a real masterpiece you need:

  • Sheets of paper;
  • Glue stick;
  • Napkins to remove the waste of glue;
  • Colored pencils, pens, and markers;
  • Sharpener and shavings from colored pencils;
  • Something heavy to press.

Useful tips for crafts with pencil shavings:

  • Select the image you like and make a layout on a piece of paper.
  • Sort out long shavings from colored pencils by color and length.
  • Apply glue to the desired area.
  • press the shaving to the glued area, wipe off the excess glue, if it appears.
  • We put the final art piece under glass or cover it with any other press that will be easily separated from it with glue residues.

To master the technique of this craft, it is better to start with simple and small projects, gradually increasing the complexity. Other parts of the image can be made in another technique: draw or cut out of colored paper.

In New Year holiday season, it will be great to decorate a hand-made postcard or a letter to Santa Claus with a pencil shaving Christmas tree. It does not have to be just green: multi-colored looks even more fun. Try to decorate it with beads or any other small details.

Another interesting tip is not to glue the pencil shavings completely, just along the inner edge to get more voluminous images. Perfectly obtained this technique you will be able to create floral arrangements.

From large pencil shavings, you can create a “real” rose.

Crafts of colored pencil shavings look like the texture of animal wool and especially bird feathers. Let’s be inspired by these beautiful projects to create a real masterpiece!

Also, it fits perfectly to express fish scales, this feature can be successfully used and inspire you to make something special.

This technique you can use for any projects even with boys. For example, a spaceship or rocket. And if you take a colored metalized paper it gives the work a festive mystery.

Do not think that this craft is interesting just for toddlers. Famous artists use the “waste” of colored pencils reaching truly perfect results. Look at the portraits of famous people by artist Kyle Bean (Kyle Bean).

With the shavings you can create magnificent ballroom dresses for princesses and beautiful ladies.

We wish you the inspiration to create something really great!

off comments

An unusual painting technique on the surface of the water called ebru art, also known as “paper marbling”. It is completely different from the usual painting and at first glance, it seems like a miracle. Drawing in the Ebru technique is exciting and not so difficult task that perfectly develops not only fantasy but also a sense of color for kids. The interpenetration of colors makes it possible to obtain unpredictable ornaments that more resemble a pattern on natural minerals or the plumage of exotic birds than the result of handmade art. Do not think that this art demands special skills, take a chance and this hobby will color your life with new colors!

Ebru painting art is suitable at home for kids and everyone, this is an unusual fascinating form of creativity. Watching the mystical birth of images from colorful chaos is an indescribable pleasure. In addition, each resulting imprint of colorful patterns is unique and inimitable, like a pattern of lines on the fingers.

It gives your kids an opportunity to fantasize, also drawing, you will receive a huge incentive to improve your skills. Paper marbling is especially entertaining – having tried it once, you will definitely want to touch magic again. In addition, amazing results can be obtained from the first time – no special skills are required.

ebru painting
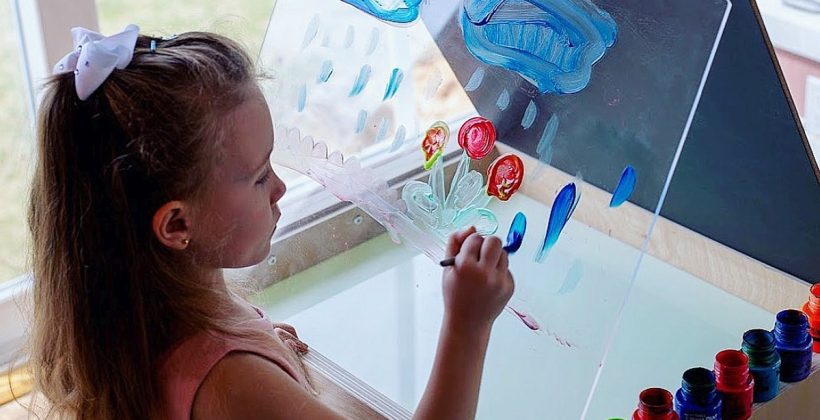
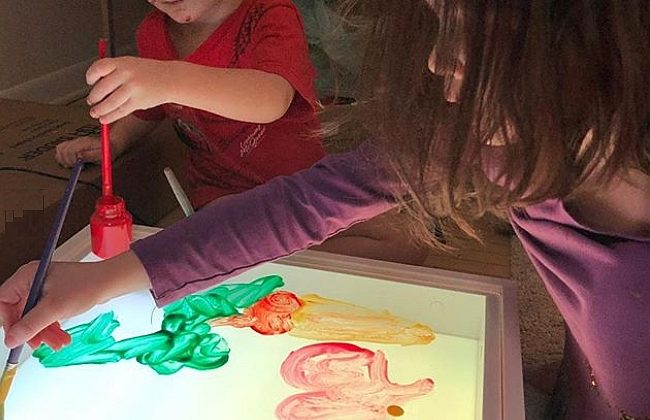
Marble painting, suitable for both people with expressive character and calm person –  everyone can find something for themselves in it. Perhaps the only category that should not enjoy ebru art is people with a pattern of thinking, accustomed to acting according to a predetermined plan and getting the expected results.

Ebru technique is not only art but also a recognized method of therapy. This is a kind of meditation, plunging into which the artist is completely dissolved in his work. This method is often used to reconcile a person with the surrounding reality, bringing harmony into his life.

Interacting with the constantly changing pattern, a person learns to live in an unpredictable world, accepting, and see the beauty in the most ordinary things and situations. In addition, colorful marble painting, like sand drawing, helps to overcome depression and to believe in our own strength.

Ebru – an ancient kind of painting. How to learn to draw on the water surface? We share the secrets!

For adults, this is one of the ways to relax and dive into the world of color, get a positive charge and a lot of pleasant impressions for a long time.

For children, ebru is an excellent tool for developing imagination, motor skills, and creativity.

It is amazing how unique pictures are created on the floating background – this is the underwater world with all its inhabitants, exotic birds, animals, butterflies, flowers and landscapes.

In the Ebru technique, special paints are used which do not mix with each other and the liquid, for transferring a drawing to paper or fabric. All materials for drawing are made from natural components which allows you to draw with children. Children who do not possess great skills in drawing are able to create real masterpieces in this technique.

In order to create a masterpiece, you need:

Ebru starter kit

or:

  • low plastic tray; ebru painting pink
  • water;
  • carrageenan powder/ready-to-use  thickener;
  • paints for ebru ;
  • brushes and styluses(separate for each color);
  • a palette for mixing paints ;
  • paper (not glossy).
  1. Pour prepared liquid into the tray.
  2. Spray different colors of paint using a brush for the background of the future picture.
  3. With a special comb, sweeping across the surface, we create a unique pattern for the next drawing stage.
  4. Further, we use styluses of various thickness. Apply colored drops on the surface and stretch them into the desired shape.
  5. Using the color scheme for the pattern, we add elements, giving the freedom of our imagination.
  6. Next, take a sheet of paper to fit the size of the tray and gently cover the image with it.
  7. In a few seconds, you can see real magic. We slide the paper carefully to the side of the tray and here it is … A masterpiece is ready!

We hope you`ll enjoy it!

off comments

Sand drawing is not only an unusual kind of art but also an effective and very popular method of art therapy.

Sand therapy as a way of working with the emotional sphere of the child is widely used by psychologists, psychoanalysts, as well as teachers and speech therapists. Today, this activity of pedagogical and creative orientation is available to any family who has an Art Light Activity Table/Box at home.

Sand as a material for sensory and educational games has several advantages. First, it is pleasant to touch it, it helps to relax, relieves emotional tension. Children love to play with loose materials, so it is perfect for activities with kids who do not like to learn at all.

Secondly, this material can be used as a solution to various problems. Drawing with sand helps to develop fine motor skills, sensory, creative thinking; when the kid draws with both hands, it contributes to the development of interhemispheric asymmetry.

Thirdly, the sand eliminates the fear of failure. This is important for children with increased anxiety. And if something does not work, you can always pour the sand and start over.

This activity helps to cognize of the world. A toddler is excited about the creation process of pictures with colored sand because with it helps the child gets acquainted with the texture and shapes of the materials. Dry sand can be even more interested than dry sand.

Esthetic enjoyment. The drawings made with sand are original and beautiful, they can embody all the fantasy of a small author.

Emotional component. Psychologists recommend drawing the whole family. This is a great opportunity to socialize and engage in collective creativity, which will definitely enjoy everyone.

Practice shows that kids who are engaged in sand drawing, not so much exposed to get stressed. During this creative activity, kids relax, get rid of negative thoughts and tension. As a result, the nervous system becomes stronger, sensitivity and aggressiveness disappear.

Sand drawing has an excellent influence on the physical and psychological development of the little artist. Children can create sand pictures at any age. Best of all, if adults join the kids  – to create joint masterpieces.

off comments

Full-size drawing

Just to continue telling about useful kids crafts. Drawing with palms and fingers is very popular now, it is really a very useful activity, but quite often we limit our children within the frames of one album sheet or dry erase board. Children love grand scale, no wonder they tend to draw on the wallpapers.

You can minimize the effects of children’s activity by giving them a large area for drawing, such as a piece of old wallpaper, a drawing paper sheet, a large piece of wrapping paper or simply glued together ordinary sheets. It can be a fun family game.

We love to turn around on the floor and create – palms, hands, objects. You can leave traces of the machines with paint or put a stamp on the jaws, spray with a toothbrush, or even take paint brushes and rollers.

Body drawing

Next popular family activity and a real passion for children is to paint on their own bodies.
It is good to use a special body painting, but if it is not found, then watercolor, finger or gouache paints will do. Let the children paint on themselves and each other for their own pleasure. It is a great opportunity to entertain them, during the process kids are getting relaxed and expressing their creativity.

Everything is washed off in a few movements, but there is a lot of fun for children. Kids enjoy drawing on unusual spots. You can use the windows, you can draw with flush colors, it is especially interesting to create themed windows, for example, a winter or spring window. And in the mirror, you can trace your reflection with the same markers. Just as an independent creative process or a way to delineate the boundaries in other games.


off comments

How to paint rice for games and crafts 

Turn usual grain into a rainbow! Step-by-step master class on how to properly color rice with food dyes and ideas for using colored rice in sensory games and children’s art: applications, crafts, dry painting.

How to dye rice at home

If you want to get multi-colored cereals for sensory boxes, creativity and educational games, it is recommended to take long-grain white rice, it is harder and stronger.

We suggest three methods of coloring:

Coloring rice with food dyes. As a result, painted grains have a smooth surface and a rich bright color that does not tarnish over time.

Painting rice with gouache. As a result, the croup turns out to be rough and after active games loses its original color.

Painting with natural dyes. These are spinach juice, beets, turmeric, saffron. Naturally colored rice acquires only a light ebb, and making the color brighter is difficult.

For dyeing rice you need:

rice;

dye;

crockery or ziplock package;

gloves;

essential oil (optional).

How to paint

Add a little dye to dry rice (not more than ½ tsp per 1 kg of cereals). The amount of dye will depend on the intensity of the color. Dry the dye previously diluted in a few drops of water. Do not add a lot of liquid: this can lead to swelling of the grits. Liquid and gel formulations (gouache) are not diluted with water. Stir the cereal thoroughly. For this, it is convenient to place the mass in a ziplock bag and shake it well.

If you mix it with a spoon in a bowl, in order to avoid painting of your hands, we recommend doing it with gloves.

After put the colored rice on a  sheet of paper and let it dry for several hours. During this time, the dye is absorbed and will not get dirty hands during the game.

If you want the rainbow mass has a pleasant smell, add a few drops of your favorite essential oil while mixing the ingredients.

Ideas for using colored rice

Colored rice is perfect as a filler for sensory boxes. These games will help the child to expand the tactile experience – kids will be able to touch, pour, explore, dig in, dig, search for toys. Using colored rice in applications and crafts, you diversify the creative process. These useful exercises with cereals contribute to the development of children fine motor skills.  Colored rice can be used to decorate the interior.

Drawing with colored rice

Drawing with colored rice is an interesting technique and wonderful leisure for small children. The surface of the picture of the grits is always obtained in relief.

Drawing with your finger over a layer of rice is the simplest technique of drawing with cereals for kids. Pour a layer of rice on a tray with sides, level it.  Let the kids draw with their fingers.  Drawing patterns develop children’s imagination and fine motor skills.

Drawing with “loose” grains – this technique is similar to drawing with sand.

Drawing with grains on modeling clay: cover the cardboard with a thin layer of it, fill the required parts of the picture with rice. It is possible to decorate the individual elements on the finished plasticine picture with a grain texture.


off comments

How to make a sensory box?

Sensory boxes consist of four elements: tray, filler, toys and “tools.”

Tray wooden box;

cardboard box;

plastic container or bowl;

wide and shallow saucepan;

plastic or metal pelvis;

inflatable pool

Filler beans, peas, lentils;

cereals (semolina, oatmeal, millet, rice, buckwheat, wheat, couscous)

cornflakes;

pasta (gossamer, shells, tubules, spirals, bows, stars);

boiled spaghetti;

flour, potato or corn starch;girl with a box for sensory play1

nuts, seeds;

cocoa, coffee;

jelly;

coarse and fine salt;

cones, acorns, chestnuts;

earth, sand, kinetic sand;

pebbles, stones;

hydrogel balls, or akvagrunt;

seashells;

moss, leaves, grass, flowers, dried berries, straw;

snow (in winter), ice (at any time of the year from the freezer);

pieces of cut paper, paper napkins (whole, torn into pieces, crumpled up in the form of balls);

cotton wool, cotton pads, cotton balls;

cloth scraps;

yarn, thread;

foam pieces;

pompons;

buttons;

paper clips;

sawdust, nuts shells;

sparkles;

water;

liquid soap;

shaving foam.

Toys animals;

cubes, balls, rings, rattles;

toy pieces of furniture;

cars;

dishes and household items;

toy food;

various boxes;

artificial plants

Tools spatula, scoop, rake;

can, bucket;

sieve funnel;

pear for water;

spoons of different sizes and types (for ice cream, for salad), ladle, skimmer;

forceps, tweezers;


cookie cutters, ice molds, muffins, various silicone molds.
plastic cups;

But do not hurry to leave the child alone with the box, even if it seems to you that you have already put a lot of effort into creating it.

Just show your kid what and how you can play, discuss different tactile sensations. You need to arouse the interest , to attract and show different ways to play.

And then make sure you gave him or her  time for a free independent game.

off comments

Today we are talking about one of the popular and useful craft activity for your kid (infants and toddler) – a sensory box.

Beautiful, captivating, developing imagination and fine motor skills, entertaining for a long time, and also an inexpensive toy … What it can be?

We are talking about a sensory box, which any parents can do with their own hands for a child. This simple invention is probably familiar to all of us. Many of today’s adults in childhood loved to sort out grandmother’s baskets with buttons, digging in a jar with fathers nuts and screws, and it’s not worth talking about exciting sandbox games – everyone loved them and now loves them. The sensory box combines all these “charms” – it is a container with loose or liquid filler and game elements of your choice.

How to play with the Art & Play sensory boxsensory box for kids

Kids usually quickly find a way to play with this toy without any adults help. Most of the sensory boxes are filled with something loose, and they can be played the same way as in a sandbox: pour the filler from the container into the container, bury and dig objects. Touching objects with different texture, kids enrich their tactile experience. A variety of games that are applicable to the sensory box can be very diverse. That’s why this toy can be universal and widely used.

What age are sensory boxes for?

The sensory box can be offered to a baby who has already learned to sit up.

Sensory box for children up to a year (from 6-8 months)

The sensory box for infants should not contain small details as they are striving to try everything on a tooth. How to fill the box? You can choose objects according to any ideas (only wooden, or only round, or of the same color). Also, on the contrary, you can offer to the child a full box of various “interesting things”: balls, rags, rattles, soft little animals, cubes. The main thing is that it shouldn’t contain items that swallow or hurt. The sensory box itself should not be very big – a wicker basket, a plastic bowl or a shallow basin is enough for the kids.

The sensory box will definitely attract the infant: a combination of various objects that can be picked up with fingers, shifted, felt, and some also make sounds – rustling, ringing or at least knocking – will not leave the child indifferent.

1-2 years

For children 1-2 years old, who no longer drag everything into their mouths, you can make a sensory box with a smaller (although, preferably, edible) filling: cereals, pasta, and dough.

Of course, the game should be under parents’ control. Now for the game will be useful “tools”: a big spoon, skimmer, shovel, rake, and even tongs.

How to play? Children really like to find objects hidden in the filler of the sensory box. Hide 10-12 toys and ask the child to find them. Suggest your child sort toys by color, size, texture or form in two containers (buckets, plates, jars). Does the child have a good time doing this with his hands? Let them try to repeat, using a spoon or skimmer! During the game with the sensory box a child can study the colors, shapes, and other properties of objects. The sensory box perfectly develops coordination and agility – for example, you can catch fish or other toys from a container filled with water.

2.5-3 years old

With children older than 2.5-3 years, it is already possible to organize real thematic games in a sensory box. You can create different stories with your child, based on preferences and imagination. Does your son love cars and everything related to them? Make a mini-car service or high-speed track. Is your daughter crazy about fairies? Then your option is a fabulous meadow. There are a lot of ideas, just use your imagination and have a good time!

off comments

How to choose a table for crafts activities for your kid?

Our Art Light Activity table🎨 can be used as a regular writing desk that grows with your baby and is a multifunctional play and creative zone

For crafts activities and creative development, a kid should have a certain place in a room.
Be more specific – a children’s table. But before buying it is necessary to understand the
nuances and differences of this piece of furniture.

In age about 1,5-2 years there comes a moment when children begin to realize themselves
as individuals: they strive to do a lot on their own, repeat what their parents do, find
interesting activities for themselves.

Reduced copies of adult things help children realize their own importance and significance
in this world. Kids’ tables (and chairs for children, which are often included) serve the same
purpose. Kids should have a place in the room where they can draw, sculpt, play board
games – do “important things” like mom or dad at the desk.

Children’s table: what should we pay attention to?

1. Tables for children must be strong, stable, but not heavy, and must be appropriate for the
age and height of the child. It is better to navigate according to the information below:

Age          Height of a child       Height of a table
1-2yo             31-35in                          13,5-15,5in
2-4yo            35-39in                          15,5-17,5in
3-6yo            38-45in                          17,5-19,5in

Creativity has no boundaries, that’s why children’s drawings from paper often transfer to the
walls. To prevent this, a kid should take a separate piece of the wall. It can be pasted over
with special wallpaper-coloring or painted with slate paint, on which you can draw with
chalk. If this is not possible, then chalkboards and paper canvases mounted directly on the
wall will be a real Solution. It allows a child to draw both standing and sitting.

The properly organized storage system is a guarantee of an order, which is often missing in
creative corners. Here you can use plastic and metal containers, where it is convenient to
put paints and albums. Pencils and pens conveniently put in metal cans, decorative
buckets. Fastening supplies for creativity is also convenient to put into different pockets or
board with holes (pegboard), roof rails and magnetic boards.

Even the youngest artist dreams of his own Exhibition. A wall at the creative corner can be
decorated with drawings of the child. For example, place them in a frame or fasten with
decorative clothespins. All kids will be pleased to admire their work and it can be a good
decoration solution.

off comments

For each child, a desk is not just a piece of furniture, it is a workplace where he has to spend a lot of
time. The convenience of the desk determine

desk for kids

s the comfort and health of the child, so this choice you
should make carefully.
First of all, it is necessary to determine exactly where the desk for the child will locate. As soon as you
know it a size and a shape of the table depend on these features.
If the desk is chosen for a long time, it makes sense to purchase a transformer that can be adjusted to
the height of the child. Posture, spine, and joints are formed during all school years, and it is very
important that the writing desk matches the size of the person sitting. Transforming desks are
adjustable for the height of the legs and the tilt of the tabletop. The disadvantage of such tables for kids
is their higher cost comparing others.
If you decide to buy a table for the future, you need to find a chair with height adjustment. Perfectly,
when the child is sitting at the table, his elbows should be located on the table top, his legs reach the
floor and bend at the knees at a right angle. The distance between the tabletop and the knees should be
about 4-6in.
In addition to the height, the width of the table top is also very important. All the necessary items for
activities should be placed on the table, and there should be a place for the child.

Some tables have a drawer which equipped with a lock, such additional feature can be purchased for an
adult child or a teenager because each kid should have his or her own personal space.
A desk can be made from any high-quality modern material. A wooden table is considered a classic.
But it is not worth buying furniture from cheap chipboard, this coating is swelling from any wet spot left
on a desk from a spilled cup of water, and can be deformed.
Plastic furniture should also be treated with caution. Some types of plastic can be unsafe for your kid.

off comments

There is a great variety of non-traditional drawing techniques. The main thing is that they allow children to quickly achieve the desired result. Children experiment with the properties of various materials, learn the movements that help create certain shapes and lines. Nontraditional drawing develops self-confidence, allows not being afraid of failure, gives freedom for creativity. The most favorite technique of unconventional drawing is an imprint of seals of various materials (stamping).

Stamping attracts with its simplicity and accessibility.  Reveals the possibility of using familiar objects as art materials. We use vegetables, fruits, leaves, twigs, dried flowers, and other natural materials as stamps. stamping drawing kids activity

Stamping is a great activity not only for one kid. You can offer a creative task using stamping techniques to 2-3 or more kids. The main advantage of it that kids can have different skills in drawing and nobody will fail.

For stamping, you can use regular paper or create a whole creative project on a craft paper roll.

You can offer a specific topic for this project – it can be any season, wheather, mood, nature or you can choose it together with a child.

According to the topic, it will be great to prepare stamps together. This activity develops fine motor skills and mobilizes your imagination. Or you can just buy the stamps in any craft store.

If you decided to do them yourself you need to encourage your fantasy. As there are a lot of interesting and creative things, you can use as stamps for drawing.

You can begin from the most common stamping techniques -the stamps of plants leaves.  The first thing you need is to prepare the leaves of trees of different shapes and colors. During the walk with kids collect leaves of various trees.

Apply paint on a leave, turn,  attach it to a sheet of paper and press. The result is an autumn leaf print.

In the same way, you can use buttons, various covers, lego, cork, sponges, cardboard etc.

This technique develops the creative possibilities of the child, the imagination, increases the interest in art activities.

Unconventional drawing techniques help kids to feel free, to be creative individuals, to see and convey on paper what is much more difficult to do in ordinary ways. When the kids are drawing, they reflect and organize their knowledge of the world.

off comments

3 SAND OPTIONS for the best touch games!

SAND FOR DRAWING

Natural quartz sand
Powdery texture gives an extraordinary tactile softness and lightness! You will be able to create with it the most beautiful sand paintings.
The grains of sand touch the fingertips, feel the tenderness!
Sand can be reused.
Touch pleasure at your home!
Use different colors for creative and interesting pictures

sand games kids

SAND FOR GAMES

Larger than natural quartz sand.
It is great for loose games!
Its texture is more contrast, with the game achieved a light micro-finger massage.
SPACE PLAY SAND

It is magic sand with fundamentally new properties!
It stretches, as if spreads out, perfectly molded, remaining dry! It is pleasant to knead like dough, the most beautiful shapes and castles are made of it.
It is used for high-end games “PRINTS”
If you have not tried cosmic sand yet, you should definitely touch this MAGIC at home with Art Light Activity Box or Table


But that is not all!

For a variety of sensory games, we suggest using –
Hydrogel balls (or orbic balls) are jelly balls, which, being saturated with water, turn into a delightful sensory pleasure.
If your child is still in the period when he or she tastes everything, we play under supervision.
Pebbles, shells, marbles – for your unlimited imagination in the presence of sets of shells with starfish, natural painted sea pebbles, glass marbles
Well, everything you want or can fantasize
Also, the greatest thing is artificial snow for winter sensory boxes.

off comments

The next fun and creativity crafts for kids using materials you have always at home is calling Non-Newtonian fluid.
Your kids or you maybe know something about this activity. A non-newtonian fluid is a great sensory play for your kids, it differs from classic boards games, but your kids will definitely enjoy this craft project. Non-Newtonian fluid for childrens play
By adding more water to the starch, we get a non-Newtonian fluid that hardens from a sharp and strong impact and flows when relaxed. In such a liquid it is very interesting to spit with your hands, and if you can, then with your feet.
How to make a mass of starch?
Pour water into a bowl. Gradually pour the starch into it. You need twice much starch than water.  Constantly mixing to homogeneity, adding starch until the mass is thick. You can check the readiness of the mass by hitting it with the palm of your hand. If the palm is not sinking, then it is ready. And now try to gently let the palm down into the mass, so palm sank. And if you again sharply slap it on the surface, then it will seem to you that you knocked on a dense body, and not on a liquid. Here is  solid-liquid mass.

You can tell the older kids a little about physics during the game. Such experiments will interest any child and draw his attention to science.

off comments

Today we are talking about flour. Let’s offer our kids to draw on flour. You can use for it our deep sanboxes or simple tray. Let’s put a little bit of flour there. Suggest to draw different figures and patterns. Does it turn out?

Focus your kids on the feeling of touching the flour. Make a palm print. Pay attention to the palm becoming white, explain it.

Describe the features of flour: white, soft, light, pleasant, flowing, loose.

Suggest pouring a little bit of water into it.

Pour water into the flour. Look to the water turns white. What have we got? Dough.play-dough board

It can be surprising, that dough has a variety of developmental, learning, and sensory benefits for kids.
It can be both playdough, and dough for pastries. Kids are enjoying squishing, smashing, pushing, pulling, twisting, cutting…Children with great pleasure are connecting to the process of manufacturing cookies. You can roll out the dough, tear it, cut it in molds, make sausages and rolls, make dumplings, cut noodles and make pizza.

If we make salt dough, then this material is perfect not only for creating figures. For example, you can make prints with various objects, use the dough as a material to fasten various parts. For example, the boys are playing at the construction site when the dough played the role of cement.

Let’s sculpt different figures from the dough (play-doh like). Fantasize. Offer your kid to create unknown animals. Modeling helps to develop motor skills. Focus on small details and shapes.

During this play you can learn new animals, shapes and things.

Another interesting material for sensory play at home is starch. It is originally similar to flour’s properties, but even in dry form, it is distinguished by its tactile sensations. However, it is also possible to draw, dig in it, look for pictures and objects. But on dry starch it is much better and noticeable to leave traces, than on the flour, it is interesting to roll cars in it. And then you can clean them with a brush. And if you add a little bit of water to the starch, it will acquire some density, which will bring its properties closer to the lunar sand. You can try to sculpt out of it, make sand cakes, even build something.

Next interesting material for sensory play which you always can find at home is salt, it can not only be added to the dough but also to arrange a number of experiments: dissolve, make crystals, change the density of water. You can also paint with salt like with sand on some dark background – oilcloth or a large sheet of cardboard. It turns out very contrasting pictures that change under the touching of small fingers. However, you can draw the picture with glue and spread salt on it. To make such a picture bright, use liquid paints on the salt, and it becomes colorful.

You can even build with salt if you gently mix a small amount of water into it to make it raw. Here you can use sand molds.

Such play supports language development, cognitive growth, fine and gross motor skills, problem solving skills, and social interaction.

off comments

Now you can find a huge variety of kinetic, and other kinds of sand in stores. They have different colors, textures and shapes, suitable for sand art for kids.

Even the most common sand is a great material for sensory games.

Kids and parents enjoy using it.
You can dig and knead it, you can play a fairy tale in it, make moats, watch the water flow away, cook soups and bake cakes from wet sand, build castles and tunnels, create worlds, mold figures.

You can organize a treasure search, archaeological excavations. Summer is a wonderful time for all these games, warm spring and autumn. But in cold weather, it is worth bringing the sandbox home. Our activity tables and boxes include a deep sandbox for safe and clean playing with sand at home.

It will be much more interesting for home games, to play with small pebbles and beads. Also, it is very important to combine materials with different properties and texture. Your kid will learn to feel the world around  through tactile contact, to distinguish features.

You can build worlds, fantasize and search for treasure in the sand, sculpt it. And you can also draw with sand. Our light tables and boxes are highlighted with 10 different colors. Drawing with sand on a highlighted board is a relaxing and calming process. Your children are able to express themselves and develop their creativity.

off comments

Welcome to all people who help kids to develop themselves and learn in a new creative way.
You will agree with us that the sensual sphere is very important in our life, both for adults and for our children. And it is necessary to take care of its development since childhood.
Today we are starting a new series of articles about sensory play. There will be a lot of ideas. And maybe, you can offer such wonderful games to your children, grandchildren, have fun and interesting time with them, find exactly new ideas for creating with them.
Of course, pictures and pleasant sounds, delicate aromas have great importance, but it is tactile sensations that are most powerful and significant. By the way, our skin is the largest organ of the human body. It is a tactile knowledge that helps babies to begin their acquaintance with the world. And it can be called leading throughout the entire period of preschool childhood.
And now we realized how important it is to give these feelings to children.
So why sensory play is so important for our kids?

Read More…

off comments